At some point during the school year, you may need to remove a student from your class. Depending on your roster method, there are a few different ways to accomplish this.
When required, you can remove students from your classes. This can be done from the Classes tab. Be certain to select the correct class of the student you want to remove.
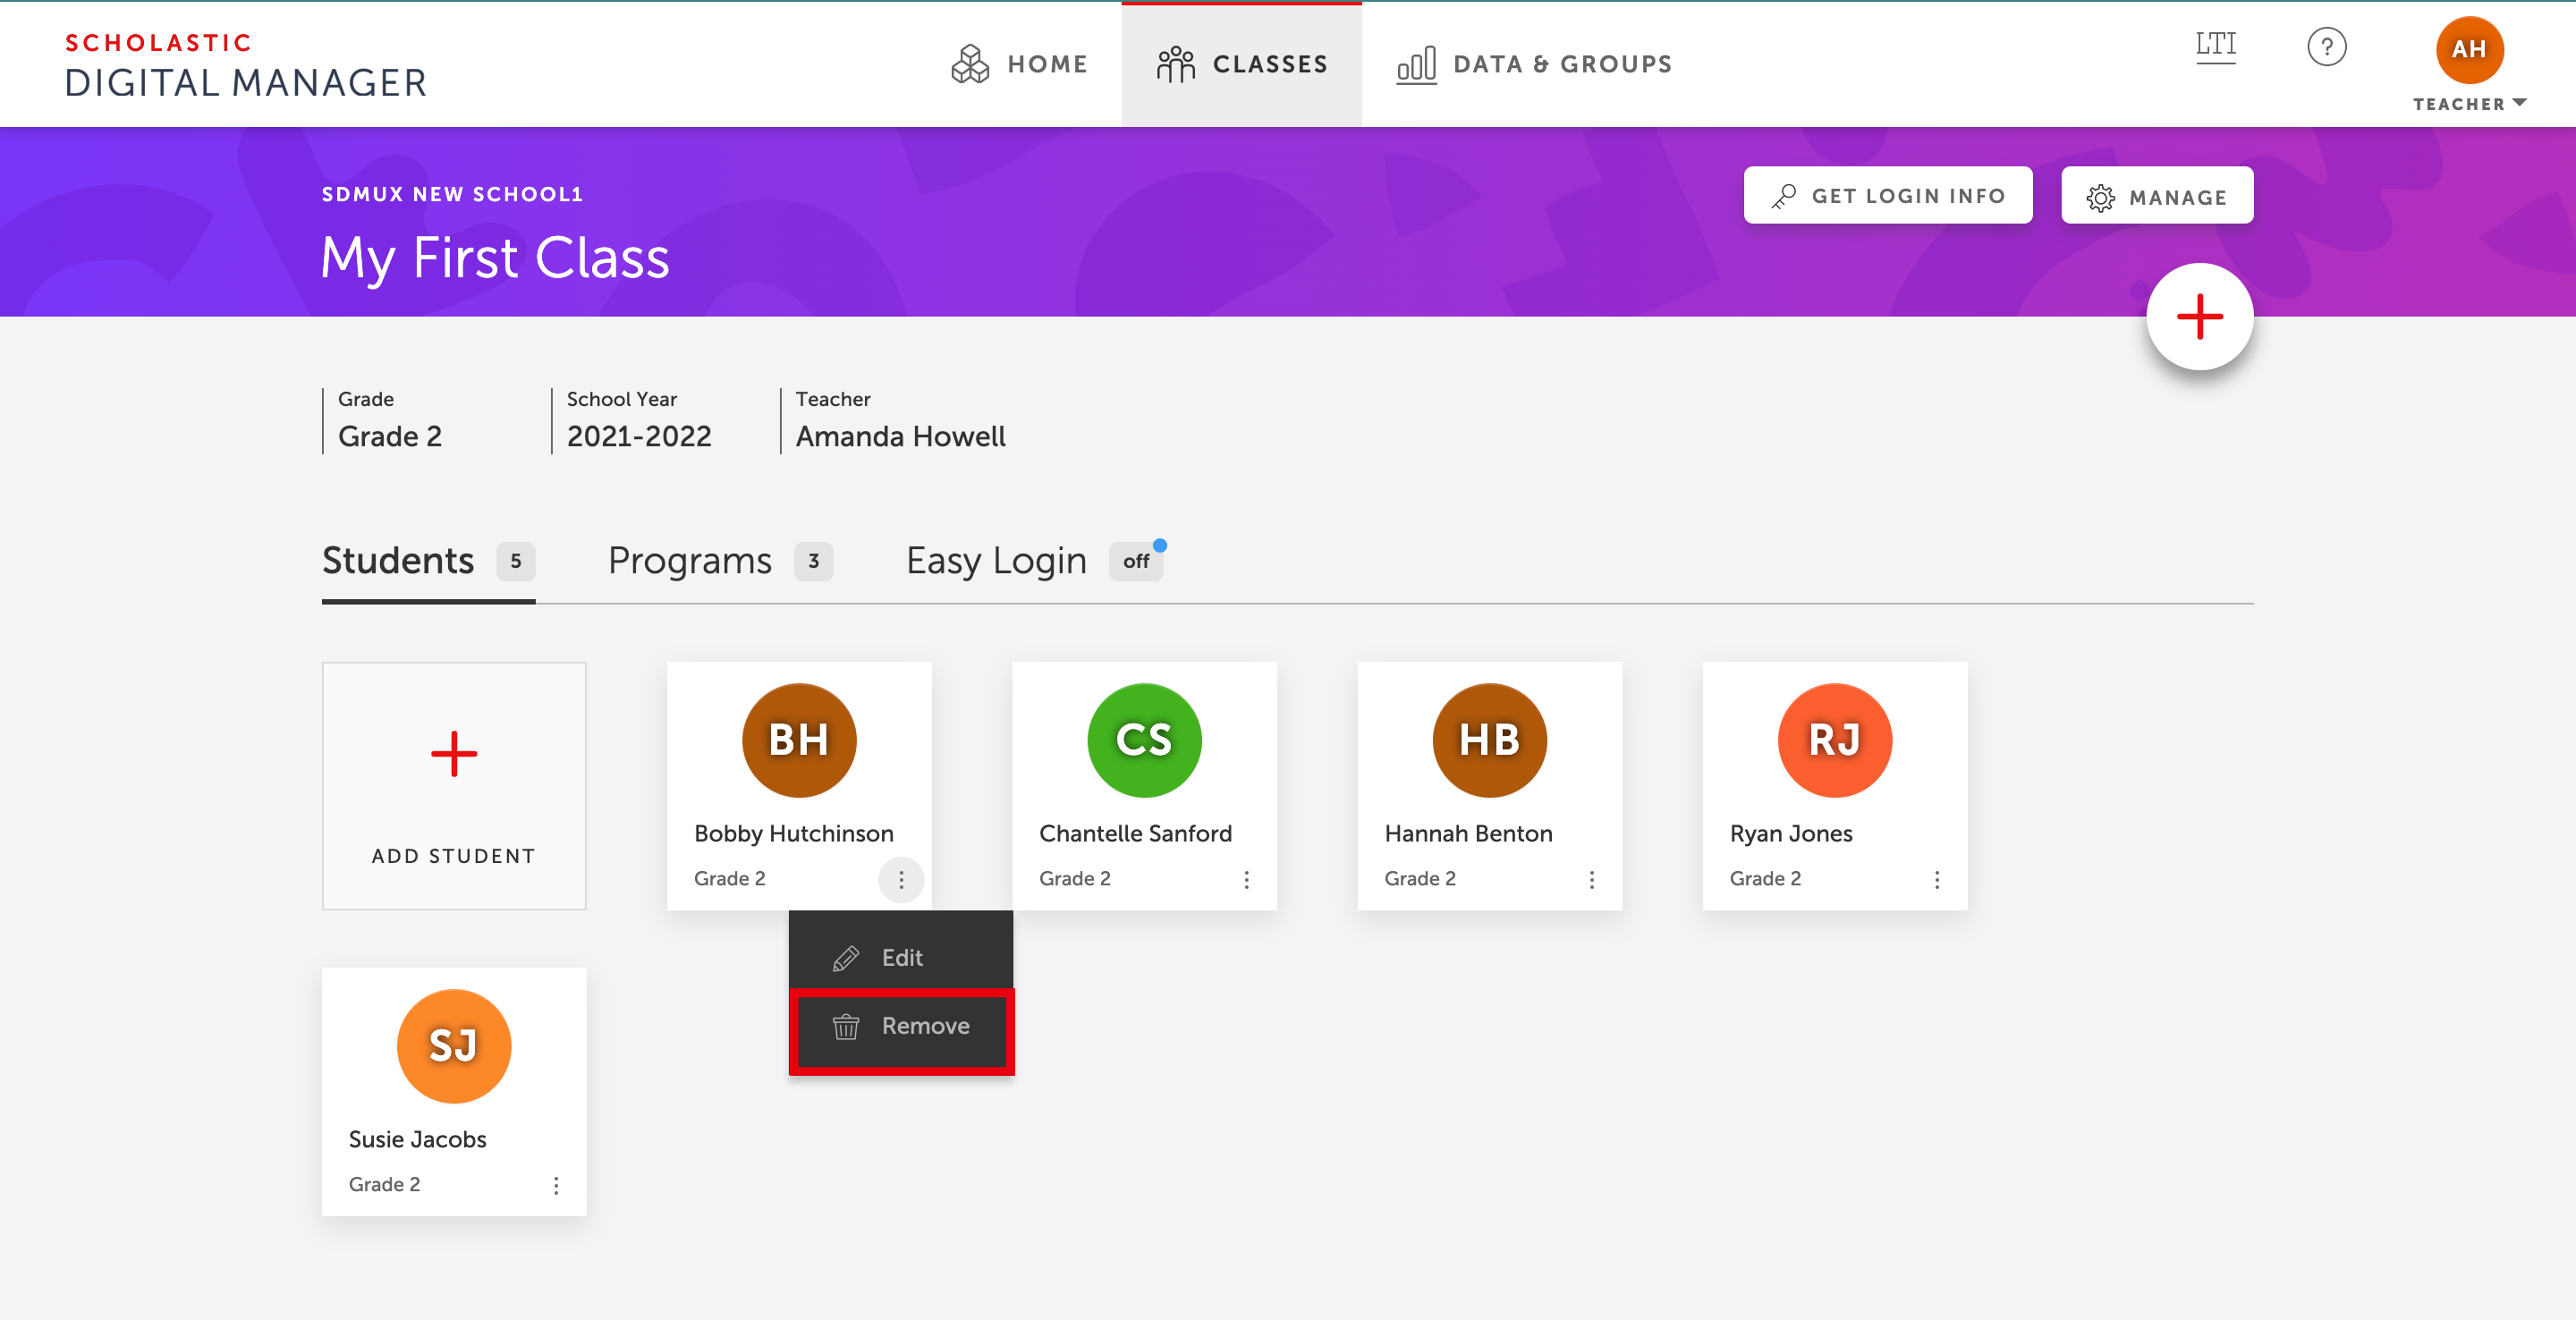
- Navigate to the student you want to remove and select the three dots on the bottom right of their account.
- Select Remove.
- Once you confirm your choice, the student will be removed from your class.
- You can add a student back into your class at any time.
Once students are removed, you will no longer be able to manage their student accounts. Removing a student from your class will not affect that student’s ability to log in or access products made available to them by other classes.
Changes made to district information within your Clever account will update and sync with Scholastic Digital Manager during a nightly automated sync process. This includes:
- New classes.
- Changes to existing classes.
- Student information such as first and last name and grade level.
- New students added to classes or existing students removed from classes.
Changes to your class roster, such as adding new classes, adding and removing students, or making spelling corrections, must be done in Google Classroom and resynced.
- Make any desired changes in Google Classroom.
- Sign in to Scholastic Digital Manager using your Google Classroom account and select the Classes tab.
- Choose a class and select Resync to resync any changes to your existing class.
Student information and settings are managed within ClassLink. To request changes, please contact your building or organization’s tech coordinator/ClassLink contact first. Once the changes are made in ClassLink, you can launch into Scholastic Digital Manager to resync your classroom.
Any changes made in your district’s or building’s Learning Management System will update and sync upon sign in.
- Each time an educator launches Scholastic Digital Manager from inside your LMS, their list of classes will automatically sync. Also, once an educator launches Scholastic Digital Manager for the first time, their students will also be able to launch Scholastic Digital Manager from within the LMS.
- Student accounts are not created or synced until that student first launches Scholastic Digital Manager. This means that a newly created class will at first appear empty—but as soon as your students also launch Scholastic Digital Manager, they will automatically be added to your classes. Any edits or updates to student account information will also be synced.
Any changes made in your district’s or building’s Schoology rosters will update and sync upon sign in.
- Each time an educator launches Scholastic Digital Manager from inside Schoology, their list of classes will automatically sync. Also, once an educator launches Scholastic Digital Manager for the first time, their students will also be able to launch Scholastic Digital Manager from within Schoology.
- Student accounts are not created or synced until that student first launches Scholastic Digital Manager. This means that a newly created class will at first appear empty—but as soon as your students also launch Scholastic Digital Manager, they will automatically be added to your classes. Any edits or updates to student account information will also be synced.
Any changes made in your district’s or building’s Canvas rosters will update and sync upon sign in.
- Each time an educator launches Scholastic Digital Manager from inside Canvas, their list of classes will automatically sync—removing any students who have been removed from your Canvas rosters.